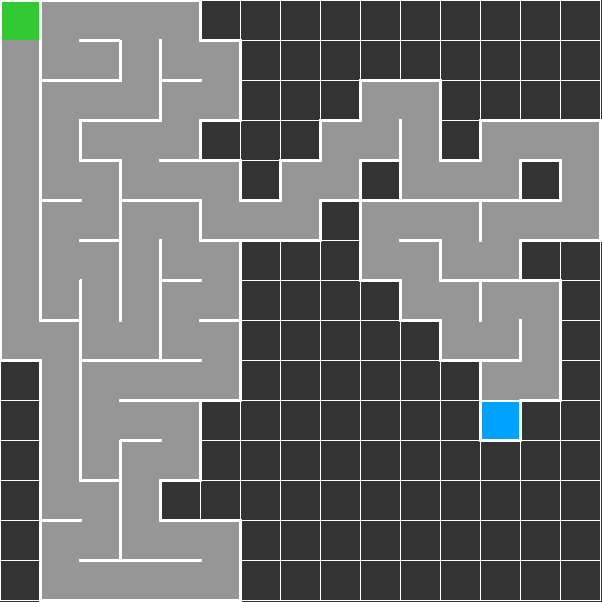


In this weeks challenge we'll take a look at maze generation with javascript. But why would you do that?
As always the intent of this challenge is to learn something new in an interesting way. This week we focus on getting more comfortable with classes and object oriented programming.
There are several different ways to generate a maze. Some more complicated than others. As this is our second challenge we'll use a simple algorithm which gets even easier as it is related to Challenge #1: Random walker.
Lets start with a square checker board. To generate the maze we will trace the path the random walker takes until it reaches the end point. For this to result in a maze we have to change the walker in several ways:
We'll use p5.js, a great javascript library for drawing and animation.
To make things easier each cell should be its own object and keep track of the following:
We are also using a global variable called "w" for the cells width/height. Using global variable is generally not a good Idea, but it is ok for smaller projects like this one.
function Cell(x, y) {
    this.x = x;
    this.y = y;
    this.wall = [1, 1, 1, 1];
    this.visited = 0;
As you can see, member variables are always named with a starting "this.".
To draw a cell it also needs a "show" function. Sometimes also called "display" or something similar. It is called each frame to display or update the cell. It has to:
I also want the start at the top left and the finish at the bottom right to have a different color.(green and red)
Memberfunction names also start with a "this.":
this.show = function () {
        var x = this.x * w;
        var y = this.y * w;
        if (this.visited) {
          if(!this.x && !this.y)
            fill(50,200,50);
          else if(this.x == cols-1 && this.y == rows-1)
            fill(200,50,50);
          else
            fill(150);
        } else {
            noFill();
        }
        noStroke();
        rect(x, y, w, w);

        stroke(255);
        if (this.wall[0]) //h line
        {
            line(x, y, x + w, y);
        }
        if (this.wall[1]) //h line
        {
            line(x + w, y, x + w, y + w);
        }
        if (this.wall[2]) //h line
        {
            line(x, y + w, x + w, y + w);
        }
        if (this.wall[3]) //h line
        {
            line(x, y, x, y + w);
        }
    }
}
We first check if the cell has been visited, if it is the start cell with position x=0 and y=0 or if it is the finish cell with position x=cols-1 and y=rows-1. We can then draw a rectangle with the correct color and check which walls should be painted using the "line" function.
We store all cells in a matrix "grid[x][y]". We will take a closer look at how to initialize this array in the next section.
As we are only using a singe walker I have decided to build it right into the main draw loop. Each frame it will do the following:
We start by checking if all adjacent cells have been visited. If we find one that has not we store it in a new array called "next".
var next = [];
  if (currentCell.x > 0 && !grid[currentCell.x - 1][currentCell.y].visited) {
      next.push(grid[currentCell.x - 1][currentCell.y]);
  }
  if (currentCell.y > 0 && !grid[currentCell.x][currentCell.y - 1].visited) {
      next.push(grid[currentCell.x][currentCell.y - 1]);
  }
  if (currentCell.x < cols - 1 && !grid[currentCell.x + 1][currentCell.y].visited) {
      next.push(grid[currentCell.x + 1][currentCell.y]);
  }
  if (currentCell.y < rows - 1 && !grid[currentCell.x][currentCell.y + 1].visited) {
      next.push(grid[currentCell.x][currentCell.y + 1]);
  }
We can now check the length of "next" to see if there are cells available for the walker to move on. In case you wonder where currentCell.x and currentCell.y in the listing above comes from, you can see how we update it at the end of the next listing.
If there are cells available, we push the current position in an array called "stack". The walker then generates a random number between 0 and next.length. As the random function generates a real number we use the floor function to round it to the next integer.
if (next.length) //if there are cells available
  {
      stack.push(currentCell); //push to stack
      ++stackc;

      var nextIndex = random(next.length);
      if (nextIndex == next.length)
          nextIndex -= 1;

      var nextCell = next[floor(nextIndex)];

      if (nextCell.x > current[0] && nextCell.y == current[1]) {
          nextCell.wall[3] = 0;
          currentCell.wall[1] = 0;
      } else if (nextCell.x < current[0] && nextCell.y == current[1]) {
          nextCell.wall[1] = 0;
          currentCell.wall[3] = 0;
      } else if (nextCell.x == current[0] && nextCell.y > current[1]) {
          nextCell.wall[0] = 0;
          currentCell.wall[2] = 0;
      } else if (nextCell.x == current[0] && nextCell.y < current[1]) {
          nextCell.wall[2] = 0;
          currentCell.wall[0] = 0;
      }

      current[0] = nextCell.x;
      current[1] = nextCell.y;
  }
If no cells are available we check "stack" to find the previous position. If "stack" has length 0 we are done!
else { //no unvisited cells reachable
      if (stack.length) {
          current[0] = stack[stackc - 1].x;
          current[1] = stack[stackc - 1].y;
          stack.splice(stackc - 1, 1);
          --stackc;
      } else {
          return;
      }
  }
You can see how we initialize the grid array down below:
current = [0, 0];

    cols = floor(canvasWidth / w);
    rows = floor(canvasHeight / w);

    for (var x = 0; x < cols; ++x) {
        grid[x] = new Array(rows); // add 2d array
        for (var y = 0; y < rows; ++y) {
            var cell = new Cell(x, y);
            grid[x][y] = cell;
            //grid[x][y].show();
        }
    }
You could try to:
