Everything you need to add WiFi to Arduino: wiring, code examples, web server, EEPROM, and PCB layout — one reference hub.
blog.hirnschall.net


Yes, I LOVE Alexa. Unfortunately, I could not find a product to upgrade my existing window blinds to work with Alexa. So, let's go through the design process and how you can upgrade your own blinds to be smart.
As always, I like to start with a list of features around which we can design the product.
The smart window blinds upgrade has to be:
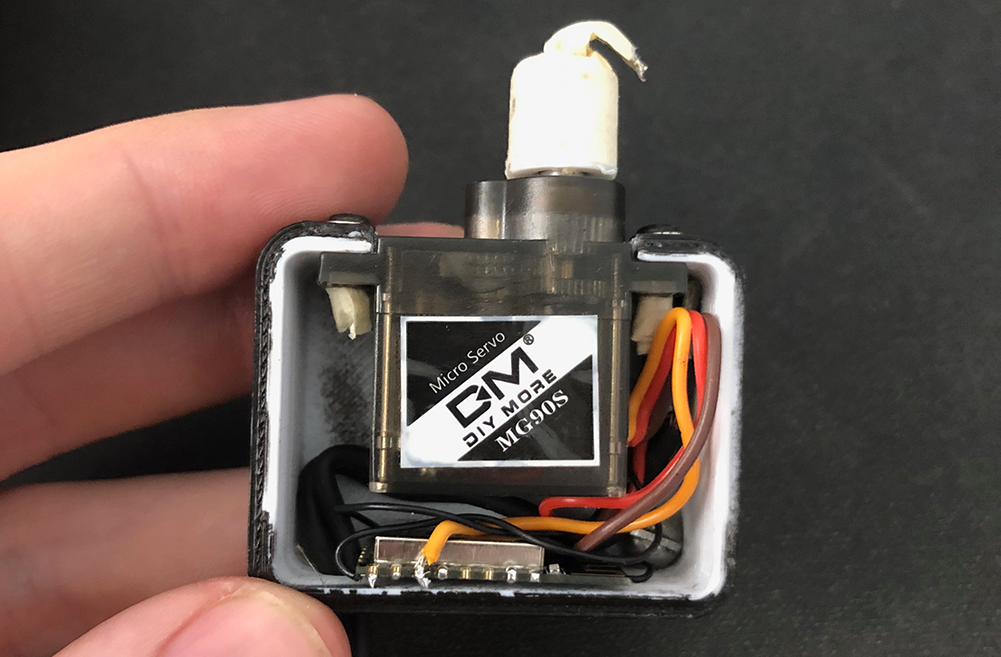
At first, I wanted to use a stepper motor to open the blinds, but it was too big and way too noisy. Instead, we'll use a small 9g servo combined with an esp wifi module. We'll need the following parts for one window:
| Component | Quantity | Where to buy |
|---|---|---|
| esp8266 (12F or 01 recommended) | × 1 | |
| 5V to 3.3V step-down converter | × 1 | |
| 9g servo | × 1 | |
| cheap USB phone charger | × 1 | |
| #CommissionsEarned | ||
We will also (temporarily) need an Arduino to program the esp and one raspberry pi acting as a hub for all Alexa/Homekit projects combined.
| Component | Quantity | Where to buy |
|---|---|---|
| Arduino Uno | × 1 | |
| Raspberry Pi | × 1 | |
| microSD Card (for Raspberry Pi) | × 1 | |
| #CommissionsEarned | ||
As most smart home accessories require some sort of hub, we will not consider the raspberry pi's cost. So, all in all, this project is about $6 to $7 per window.
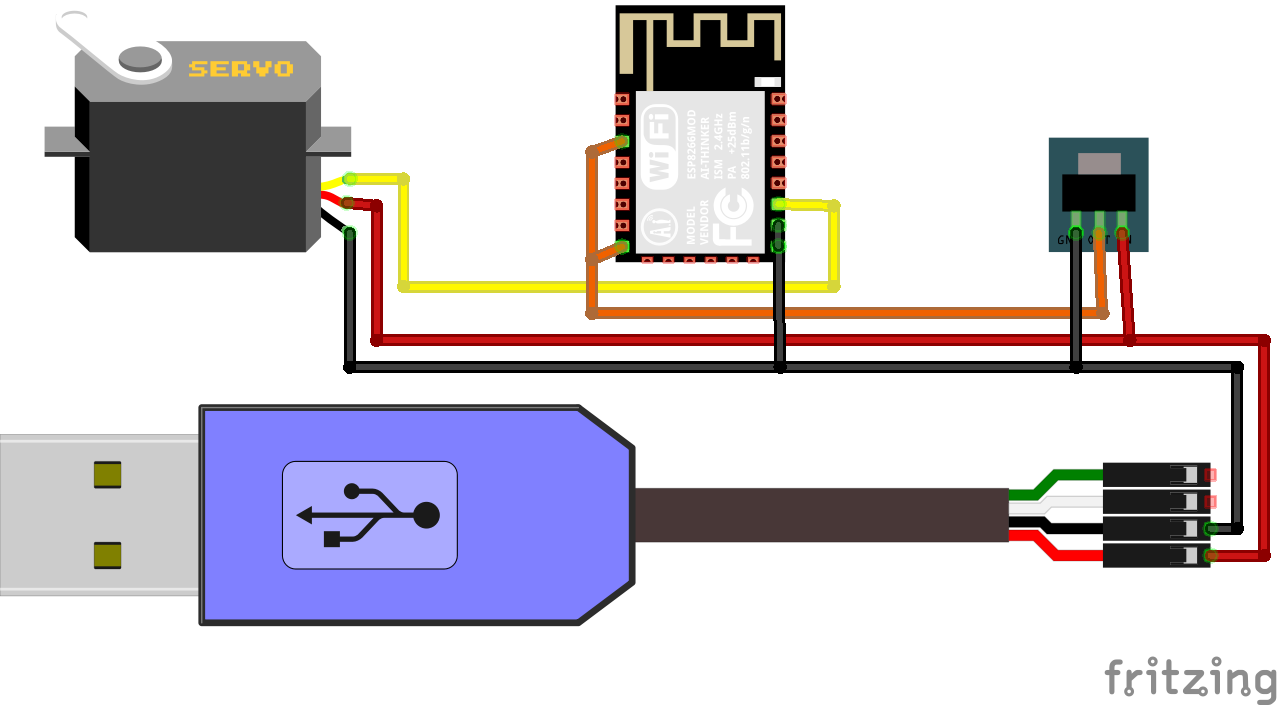
As the esp8266 uses 3.3V and the USB charger outputs 5V, we'll use a cheap step down converter. The servo itself uses 5V. You can see how to connect everything in the schematic below. You can (as always) download everything you need to build this project yourself in the download section.
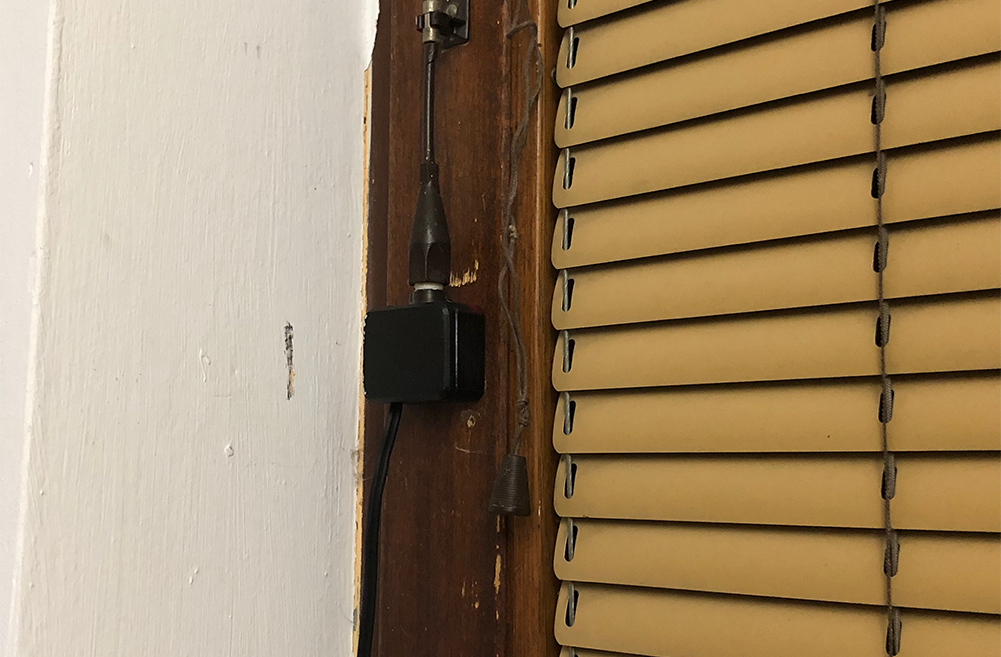
To make this project really stand out, I decided to 3d print a custom enclosure. This is not required as you can use any plastic box and make the necessary cutouts with a sharp knife. (Tip: heat the knife up using a lighter to cut through plastic easily).
I used speaker-wire as it is very thick (thanks to all audiophiles), long and cheap. We can cut through a cheap USB cable we no longer need and connect the red (+) and black (-) wire to the speaker-wire.
To use our own product with Alexa and Homekit, we'll use Homebridge on a raspberry pi. Please take a look at https://github.com/homebridge/homebridge-raspbian-image for detailed instructions on how to install Homebridge.
We will also use the homebridge-alexa plugin and the http-window-blind plugin. http-plugins allow us to easily add DIY smart home products using http and an esp.
We can take a look at the http-window-blind plugin to see how the esp is supposed to respond to requests.
The plugin will use a get variable named "pos" to pass a value between 0 and 100 to the esp, and it expects the response to be json. E.g. {"position":"20"} where 20 is 20% open.
Implementing this is straight forward. Upon an http-request, we map the "pos" value to an angle between 0 and 180 degrees and set the servo position accordingly. You can download the code for this project below.
Now all that's left is to program the esp using an Arduino. We can do this with the Arduino IDE, as seen in this post: How to program an esp8266 with Arduino.
As the new window blinds work with both Alexa and Homekit, we can use an apple tv for automation. I like my blinds to open and close at sunrise/sunset. Another great feature is automatically closing them when I leave and open them when I arrive at home.
I am really happy with this project. One of the main goals was to automatically close the blinds as soon as it gets dark outside to prevent people from seeing inside when the lights are on. This works great, and it is a great project to show off :) After all, we automated our window blinds ourselves!
Everything you need to add WiFi to Arduino: wiring, code examples, web server, EEPROM, and PCB layout — one reference hub.
Build a multi-switch useless box with a single moving arm, custom PCB, and 3D-printed mounting — full Arduino code and STL files included.

This project (with exceptions) is published under the CC Attribution-ShareAlike 4.0 International License.
1: As an Amazon Associate I earn from qualifying purchases.

